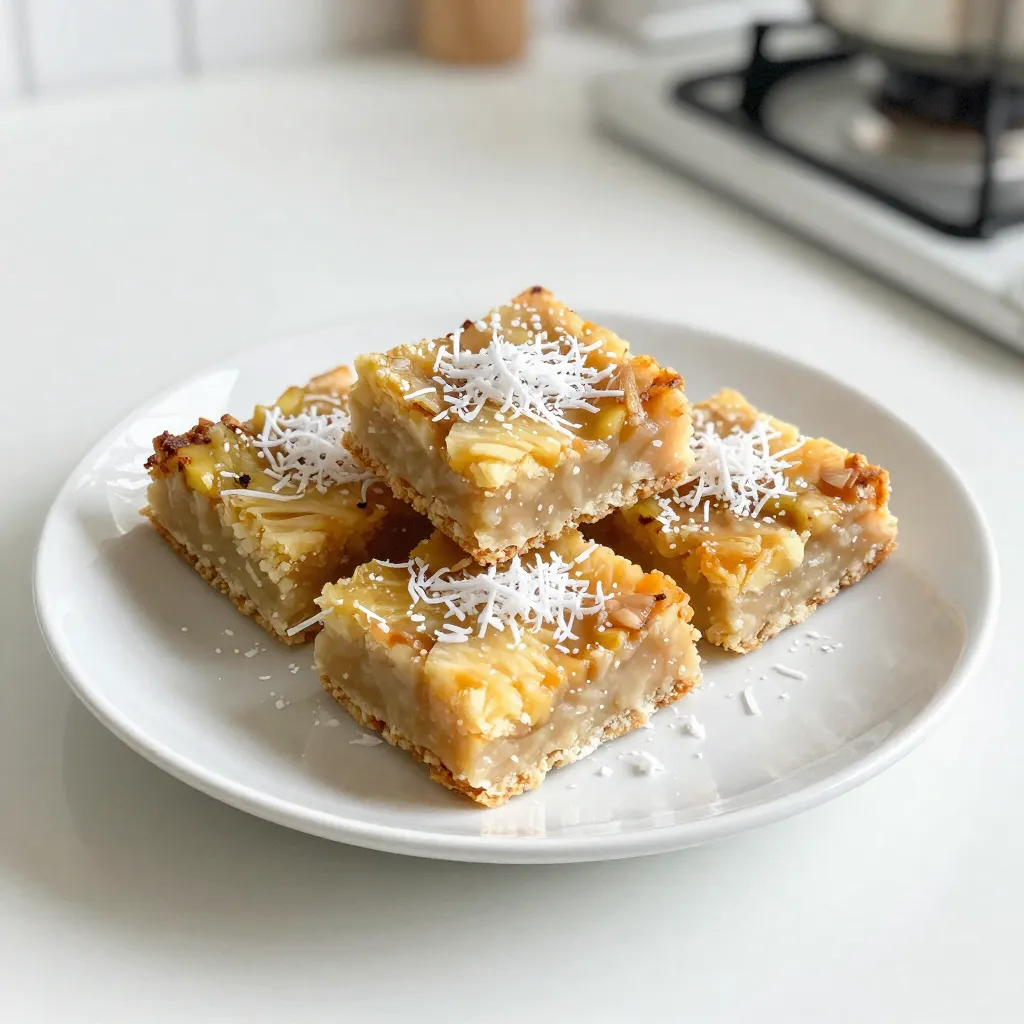
Craving a sweet escape? Let me introduce you to my Tropical Pineapple Coconut Bars! These easy-to-make treats bring a taste of the tropics right to your kitchen. With juicy crushed pineapple and rich coconut, every bite is a sunny delight. Perfect for dessert or a snack, these bars will thrill your taste buds. Ready to dive into this delicious recipe? Let’s get started and bring some tropical sunshine into your day!
Why I Love This Recipe
- Delicious Tropical Flavors: This recipe combines the sweet and tangy taste of pineapple with the rich, creamy texture of coconut, creating a delightful tropical treat that transports you to a sunny beach.
- Easy to Make:
- Perfect for Any Occasion: Whether it’s a summer picnic, a birthday party, or a cozy afternoon snack, these bars are versatile enough to be enjoyed on any occasion.
- Customizable: You can easily modify this recipe by adding nuts, chocolate chips, or experimenting with different types of coconut to suit your taste preferences.
Ingredients
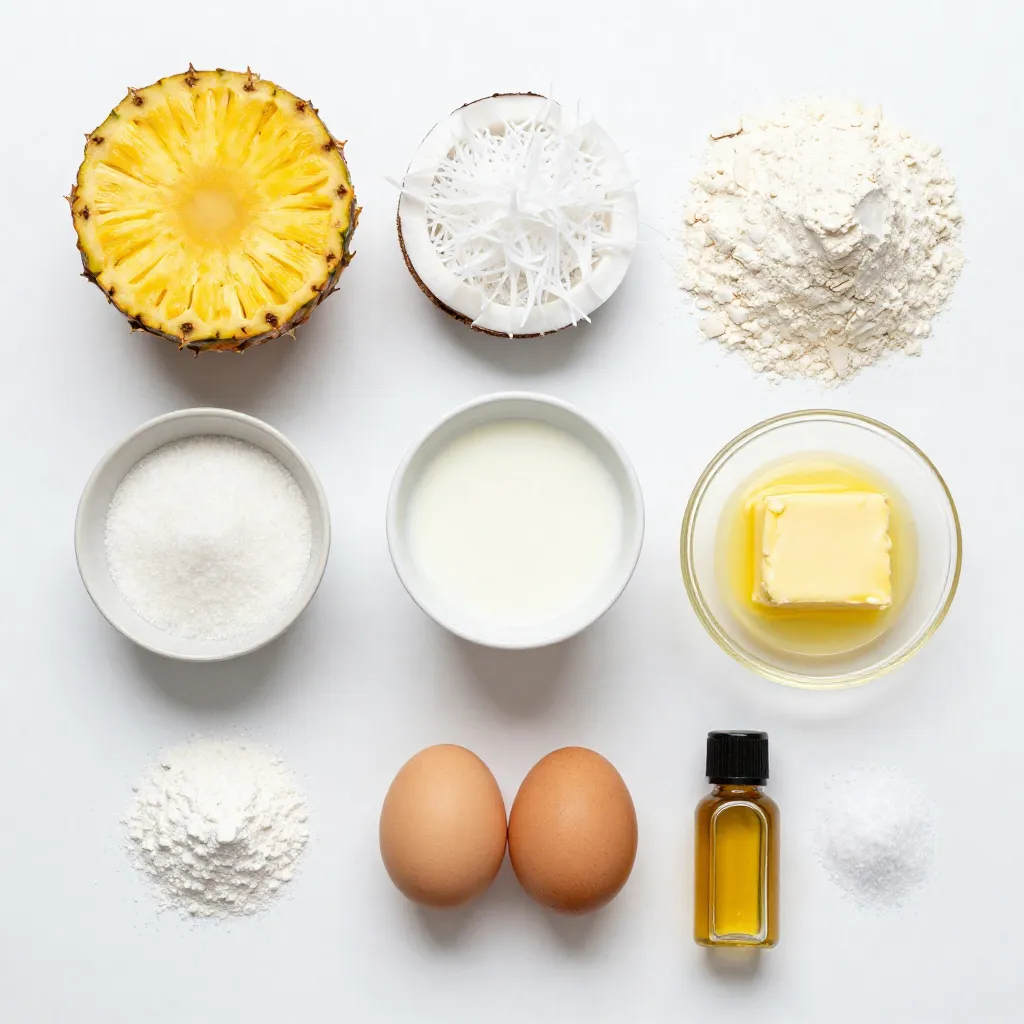
To make these delightful Tropical Pineapple Coconut Bars, you need the following ingredients:
– 1 cup crushed pineapple, drained
– 1 cup shredded coconut (sweetened or unsweetened, based on preference)
– 1 cup all-purpose flour
– 1/2 cup granulated sugar
– 1/2 cup unsweetened coconut milk
– 1/4 cup unsalted butter, melted
– 2 large eggs
– 1 teaspoon baking powder
– 1/2 teaspoon vanilla extract
– A pinch of salt
Each ingredient plays a key role in the flavor and texture of the bars. For instance, the crushed pineapple adds a juicy sweetness. The shredded coconut gives a lovely chewy texture.
Using both all-purpose flour and baking powder helps the bars rise and stay soft. The eggs bind everything together, while the melted butter adds richness.
You can choose sweetened or unsweetened coconut based on your taste. If you want a richer coconut flavor, use unsweetened coconut. The coconut milk makes the bars moist and creamy.
Don’t forget the pinch of salt! It enhances the sweetness and balances the flavors perfectly. These ingredients work together to create a tropical taste that feels like a sunny getaway.
Step-by-Step Instructions
Prepping the Oven and Baking Pan
First, set your oven to 350°F (175°C). This step warms up the oven now. Next, take a 9×9 inch baking pan. Grease it with non-stick spray or line it with parchment paper. Doing this helps the bars come out easily.
Mixing Wet Ingredients
In a mixing bowl, add 1 cup of drained crushed pineapple. Then, add 1 cup of shredded coconut. You can choose sweetened or unsweetened coconut. Next, pour in 1/2 cup of melted unsalted butter. Then, add 1/2 cup of coconut milk and 1/2 teaspoon of vanilla extract. Mix these well until they blend completely.
Combining Dry Ingredients
In another bowl, whisk together 1 cup of all-purpose flour, 1/2 cup of granulated sugar, 1 teaspoon of baking powder, and a pinch of salt. This mix adds structure and sweetness to your bars. Make sure there are no lumps in the flour.
Folding in the Eggs
In a small bowl, crack 2 large eggs and beat them until they are frothy. Slowly fold these eggs into your wet mixture. Be gentle as you mix; you want everything to blend without overmixing. A few lumps are just fine.
Baking and Cooling Process
Now, pour the batter into your prepared baking pan. Make sure to spread it evenly into the corners. Bake it in the oven for 25 to 30 minutes. The bars are done when the top is golden brown and a toothpick comes out clean. Once baked, let the bars cool in the pan for about 10 minutes. Then, move them to a wire rack to cool completely. After cooling, slice them into bars and enjoy!
Tips & Tricks
How to Achieve the Best Texture
To get the best texture in your Tropical Pineapple Coconut Bars, watch your mixing. Mix the wet and dry ingredients just until they come together. Overmixing makes the bars tough. You want them soft and chewy. If you see a few lumps, that’s okay. They will bake out and create a wonderful texture.
Adjusting Sweetness and Coconut Flavor
If you want sweeter bars, add more sugar. Start with an extra tablespoon. For more coconut flavor, use sweetened shredded coconut. Unsweetened coconut gives a milder taste. You can also add a splash of coconut extract if you like.
Serving Suggestions
These bars taste great on their own, but you can dress them up! Try topping them with extra shredded coconut. A drizzle of melted chocolate can also add a nice touch. For a fun twist, serve them with a scoop of vanilla ice cream. Enjoy them with friends or at a party!
Pro Tips
- Use Fresh Ingredients: For the best flavor, use fresh crushed pineapple instead of canned. If using canned, ensure it is well-drained.
- Adjust Sweetness: Depending on your preference, you can adjust the amount of sugar based on the sweetness of your pineapple and coconut.
- Cooling Time: Allow the bars to cool completely before slicing to ensure clean cuts and to prevent them from crumbling.
- Add Texture: Consider adding chopped nuts or chocolate chips to the batter for an extra layer of texture and flavor.
Variations
Gluten-Free Option
You can make these bars gluten-free easily. Just swap the all-purpose flour with a gluten-free blend. Look for blends that work well in baking. They should include xanthan gum. This will help give your bars the right texture. Your friends won’t even know they are gluten-free!
Adding Tropical Fruits
Feel free to add more tropical fruits. Mango, banana, or papaya work great. Dice them small so they mix well. You can add about half a cup of these fruits. This will make your bars even more flavorful and fun. Think of it as a mini tropical vacation in every bite!
Different Coconut Types (sweetened vs unsweetened)
You can choose between sweetened and unsweetened coconut. Sweetened coconut adds extra sugar and a rich taste. Unsweetened coconut gives a more natural coconut flavor. Both types work well in the recipe. Pick the one that fits your taste! If you want a less sweet bar, go for unsweetened.
Storage Info
How to Store Leftover Bars
To keep your Tropical Pineapple Coconut Bars fresh, store them in an airtight container. Place parchment paper between layers to prevent sticking. These bars do best in the fridge. They can last up to a week when stored properly.
Freezing Instructions
If you want to save some bars for later, freezing is a great option. Wrap each bar in plastic wrap, then place them in a freezer bag. Squeeze out as much air as possible before sealing. They will stay fresh for about three months. When you’re ready to enjoy, just thaw them in the fridge overnight.
Shelf Life of Tropical Pineapple Coconut Bars
These tasty bars have a shelf life of about one week in the fridge. If you freeze them, they remain good for about three months. Always check for signs of spoilage before eating. If they smell off or have changed color, it’s best to toss them. Enjoy these delightful treats fresh for the best taste!
FAQs
Can I use fresh pineapple instead of canned?
Yes, you can use fresh pineapple. Just make sure to crush it well and drain any excess juice. This will help keep your bars from being too wet. Fresh pineapple adds a bright flavor, making your bars even tastier.
How do I know when the bars are done baking?
You can tell the bars are done when the top is golden brown. Insert a toothpick into the center. If it comes out clean, your bars are ready. The edges may pull away from the pan slightly, which is a good sign.
What can I substitute for coconut milk?
If you need a substitute for coconut milk, try using almond milk or oat milk. These options will still give you a nice flavor. Coconut cream is another choice if you want a richer texture.
Can I make these bars vegan?
Yes, you can make these bars vegan! Replace the eggs with flax eggs or applesauce. Use a plant-based butter instead of regular butter. Ensure your coconut milk is also plant-based. These swaps will keep your bars delicious and vegan-friendly.
We explored making delicious tropical pineapple coconut bars with simple steps. I shared key ingredients, like pineapple, coconut, and butter, that create a tasty treat. You learned how to mix and bake for the right texture. I also included tips to adjust sweetness and serving ideas to make them special. Don’t forget variations, like gluten-free or adding fruits. Store leftover bars properly to enjoy later. Now you have everything you need to create this awesome dessert! Enjoy your bakin