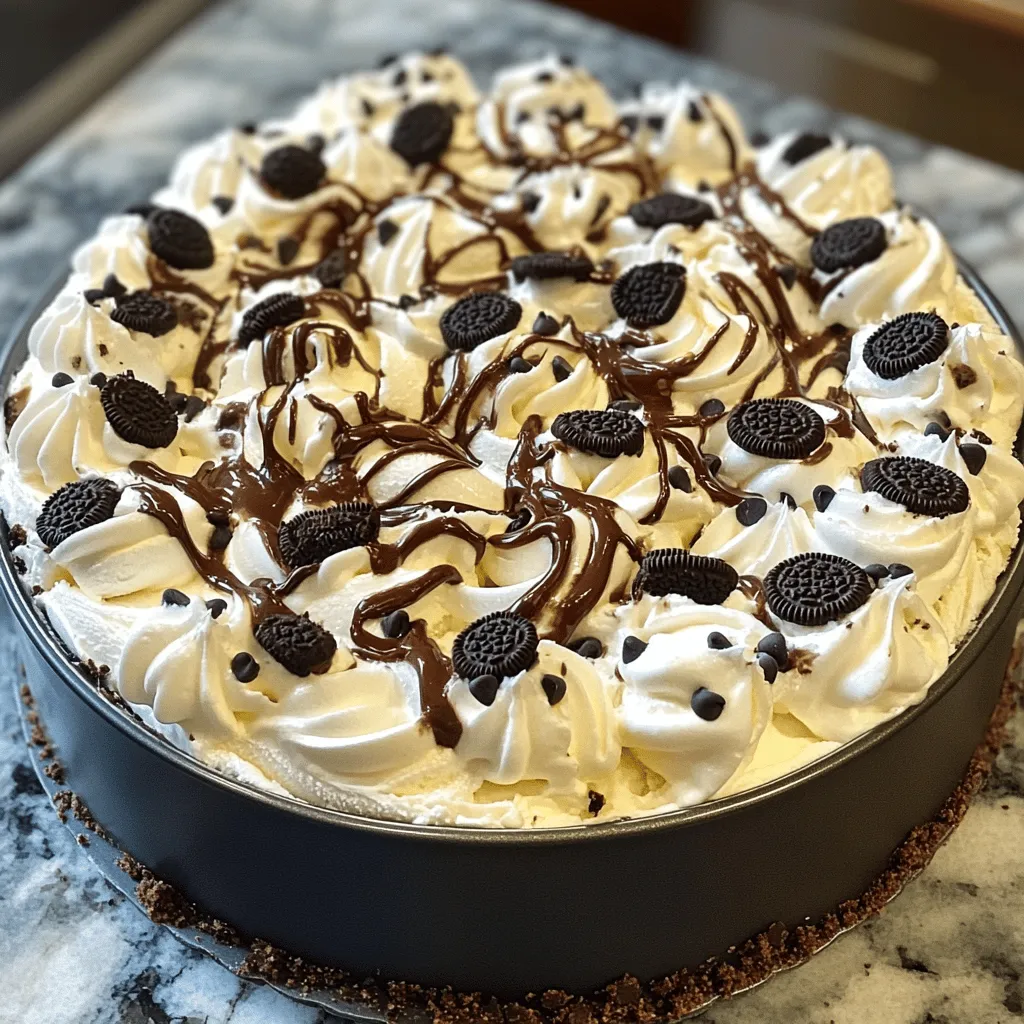
Are you ready for a treat that will wow your taste buds? The Oreo Blizzard Ice Cream Cake is simple to make and packed with flavor. With creamy layers of ice cream and crunchy cookie crust, it’s perfect for any occasion. Follow my guide, and you’ll whip up this delicious dessert in no time. Let’s dive into the sweet details of creating your own Oreo Blizzard Ice Cream Cake!
Ingredients
Complete List of Ingredients for Oreo Blizzard Ice Cream Cake
To make this tasty Oreo Blizzard Ice Cream Cake, gather these ingredients:
– 1 box of Oreo cookies (about 14.3 ounces)
– 1/2 cup unsalted butter, melted
– 1/2 gallon vanilla ice cream, softened
– 1 cup whipped cream (store-bought or homemade)
– 1/2 cup hot fudge sauce (store-bought or homemade)
– 1/2 cup crushed Oreos, for topping
– 1/2 cup mini chocolate chips (optional)
These simple items create layers of flavor and fun in your cake.
Common Ingredient Substitutions
If you lack some ingredients, don’t worry! Here are some swaps:
– Use gluten-free Oreos if you want a gluten-free option.
– Swap vanilla ice cream for chocolate ice cream for a richer taste.
– Use whipped topping instead of whipped cream for ease.
– Try caramel sauce instead of hot fudge for a sweet twist.
These changes keep your cake delicious and unique.
Tools and Equipment Needed
Before starting, make sure you have these tools:
– 9-inch springform pan
– Large mixing bowl
– Spatula for spreading
– Knife for swirling
– Plastic wrap for freezing
Having the right tools makes the process smooth and fun.
Step-by-Step Instructions
Preparing the Cookie Crust
To start, preheat your oven to 350°F (175°C). This step warms the oven for baking. Next, take a box of Oreo cookies. Crush them into fine crumbs in a large bowl. You can use a rolling pin or a food processor for this. Once crushed, mix these crumbs with 1/2 cup of melted butter. Stir until the crumbs are well coated.
Now, take a 9-inch springform pan. Press the cookie mixture firmly into the bottom. Make sure it is even and compact. Bake this in the preheated oven for about 10 minutes. This step helps form a sturdy crust. After baking, let it cool completely before adding the ice cream.
Layering the Ice Cream
Once the crust is cool, take 1/2 gallon of softened vanilla ice cream. Spread it evenly over the cookie crust. Use a spatula to smooth the top. This ice cream layer is key for a creamy texture. After that, drizzle 1/2 cup of hot fudge sauce over the ice cream. Take a knife and gently swirl it into the ice cream. This creates a delicious marbled effect.
Next, fold 1 cup of whipped cream into any remaining softened ice cream. This step adds fluffiness to the cake. Spoon this mixture on top of the fudge layer. Spread it evenly to cover the fudge completely.
Final Assembly and Freezing
Now, it’s time to top your cake. Sprinkle 1/2 cup of crushed Oreos over the whipped cream layer. If you like, you can also add 1/2 cup of mini chocolate chips for extra flavor. This adds crunch and sweetness.
Cover the cake with plastic wrap and place it in the freezer. Let it freeze for at least 4 hours. This time allows the cake to set properly. When you are ready to serve, take it out of the freezer. Let the cake sit at room temperature for about 10 minutes. This makes slicing easier. Release the sides of the springform pan, and slice into wedges. Enjoy your Oreo Blizzard Ice Cream Cake!
Tips & Tricks
How to Achieve the Perfect Cake Texture
To get a great cake texture, use softened ice cream. It spreads easier on the crust. Make sure you let the crust cool before adding the ice cream. If you want a creamier feel, fold whipped cream into the softened ice cream. This adds air and makes it light. If you swirl the hot fudge into the ice cream, it gives a nice texture contrast.
Serving Suggestions for Oreo Blizzard Ice Cream Cake
When it’s time to serve, think about toppings. A drizzle of hot fudge adds richness. You can also use chocolate sauce or caramel for extra flavor. Fresh whipped cream on top gives a nice touch. Add some extra crushed Oreos for crunch. This makes each slice look fun and taste amazing. You can serve this cake with a scoop of vanilla ice cream for extra delight.
Best Practices for Slicing and Serving
For easy slicing, let the cake sit at room temperature for about 10 minutes. This softens the edges and makes cutting simpler. Use a sharp knife, and clean it between cuts for neat slices. If you have trouble, dip the knife in warm water. This helps cut through the frozen layers. Serve each slice right after cutting to keep it from melting too fast. Enjoy your delicious treat!
Variations
Flavor Variations for Ice Cream and Toppings
You can switch up the flavors in your Oreo Blizzard Ice Cream Cake. Instead of vanilla ice cream, try chocolate or cookies and cream. These flavors blend well with Oreos. You can also add different toppings. Think about using caramel sauce, sprinkles, or crushed candy bars. Mixing flavors keeps it exciting.
Gluten-Free or Dairy-Free Substitutes
If you need gluten-free options, use gluten-free Oreos. They taste just as good! For dairy-free needs, use coconut milk ice cream or almond milk ice cream. These options still give you a creamy texture without dairy. Remember to check labels for any hidden dairy or gluten.
Creative Serving Ideas for Special Occasions
You can make this cake stand out for parties. Use fresh fruits like strawberries or raspberries for a pop of color. Adding mint leaves can make it look fancy. You could even drizzle extra hot fudge on top right before serving. For a birthday, place candles on the cake for a fun surprise.
Storage Info
How to Properly Store Leftover Cake
To keep leftover Oreo Blizzard Ice Cream Cake fresh, cover it well. Use plastic wrap or aluminum foil to seal the cake tightly. If you have a cake box, that works too. This will help prevent freezer burn and keep the flavors intact. Store the cake in the freezer for best results.
Freezing and Defrosting Tips
If you want to freeze the cake, it’s best to slice it first. This makes it easier to serve later. Wrap each slice in plastic wrap before placing them in a freezer-safe bag. When you want to enjoy a slice, just take it out. Let it sit at room temperature for about 10-15 minutes to soften before eating.
Shelf Life of Oreo Blizzard Ice Cream Cake
The shelf life of this cake is about three months in the freezer. If you store it in the fridge, eat it within three days. Always check for any off smells or changes in texture. Enjoying it fresh will give you the best taste.
FAQs
Can I Make This Cake in Advance?
Yes, you can make this cake ahead of time. I often prepare it a day before serving. Just freeze it after you layer everything. This will give the cake enough time to set properly. When you are ready to serve, let it sit at room temperature for about 10 minutes. This makes it easier to slice.
Where Can I Buy Oreo Blizzard Ice Cream Cake?
You can find Oreo Blizzard Ice Cream Cake at many ice cream shops or bakeries. Some grocery stores also sell similar cakes in their frozen dessert section. If you want the exact recipe, I suggest making it at home. It’s simple and fun. You can customize it to your taste, too.
What Are the Nutritional Facts for This Recipe?
This cake is rich and delicious! Here’s a quick look at the nutritional facts per slice (based on 12 servings):
– Calories: 350
– Total Fat: 20g
– Saturated Fat: 10g
– Cholesterol: 50mg
– Sodium: 200mg
– Total Carbohydrates: 40g
– Dietary Fiber: 1g
– Sugars: 25g
– Protein: 4g
These facts can vary based on ingredients.
In this blog post, we explored how to make an Oreo Blizzard Ice Cream Cake. We covered the complete list of ingredients and handy substitutions. The step-by-step instructions guided you through each phase of the process, from crust to assembly. Tips for texture and serving made it easier to enjoy your creation. Lastly, variations and storage tips ensured your cake stays fresh.
Making this cake is fun and rewarding. Now, you can impress friends and family with your skills!