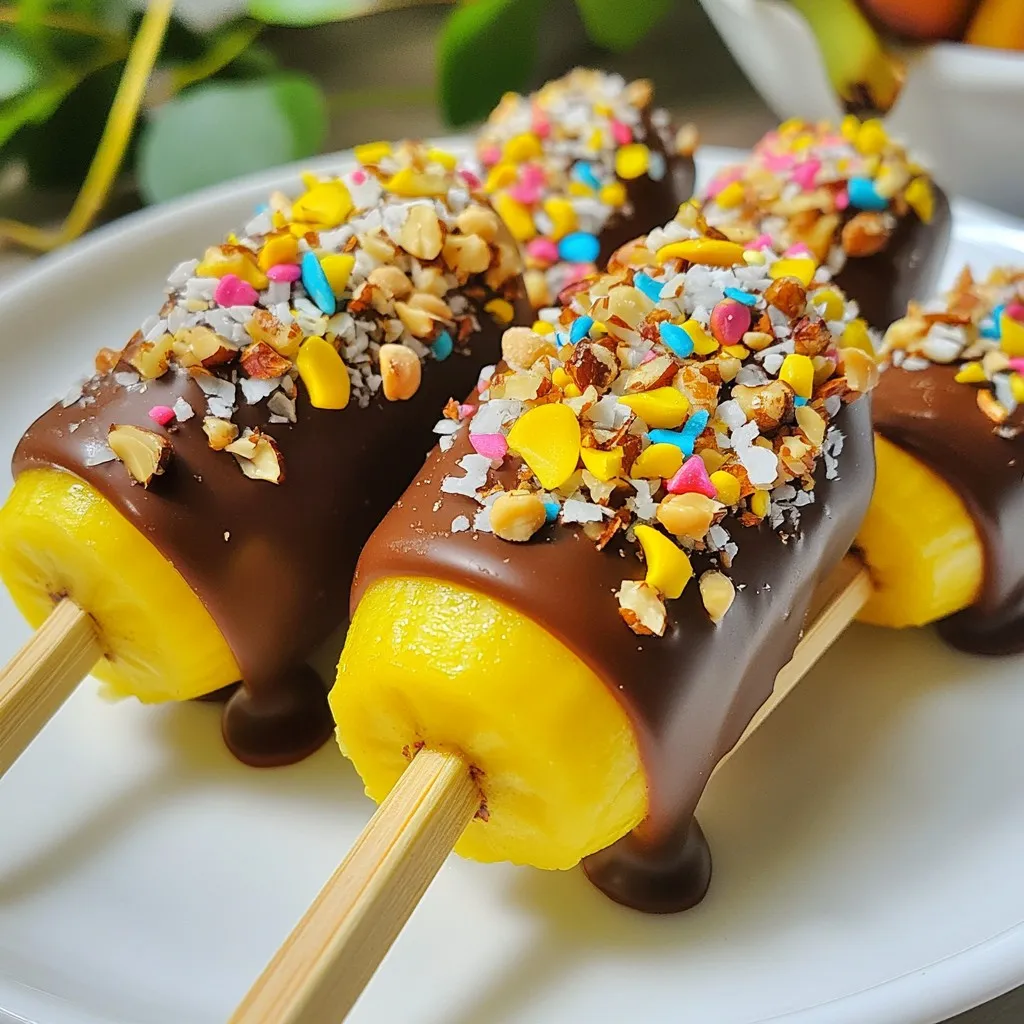
Craving a sweet treat that’s easy to make? Look no further! This Chocolate Covered Banana Pops Delightful Recipe Guide is just what you need. With just a few simple ingredients, you can create a fun dessert that pleases kids and adults alike. I’ll walk you through each step, from selecting ripe bananas to customizing your toppings. So, roll up your sleeves and let’s make a delicious snack that everyone will love!
Why I Love This Recipe
- Quick and Easy: This recipe requires minimal prep time and simple ingredients, making it perfect for a quick treat.
- Customizable: You can mix and match toppings like nuts, coconut, and sprinkles according to your preference.
- Healthy Indulgence: Bananas provide natural sweetness and nutrients, making these pops a healthier dessert option.
- Fun for Everyone: It’s a fun activity for kids and adults alike, perfect for parties or a family snack time.
Ingredients
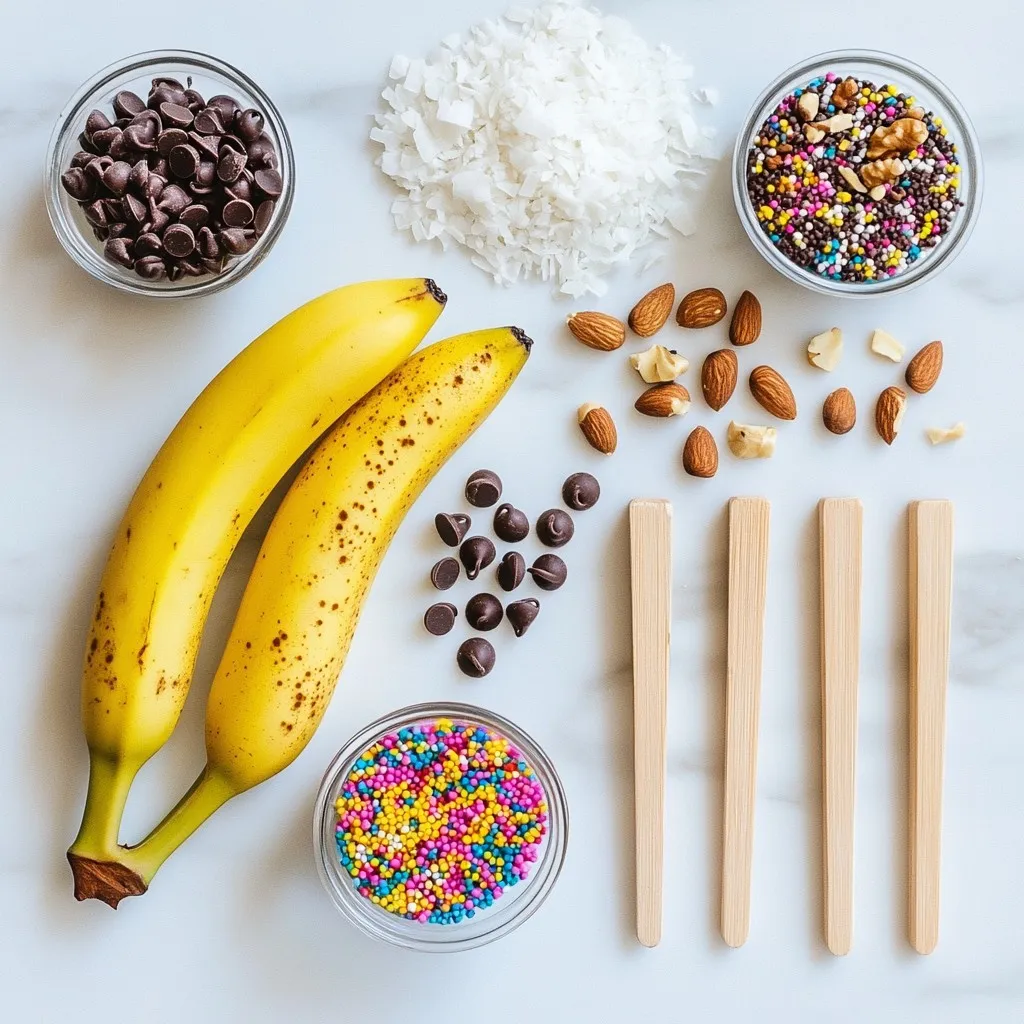
To make delicious chocolate covered banana pops, you need a few simple items. Gather these ingredients before you start:
– 2 ripe bananas
– 1 cup dark chocolate chips
– 1 tablespoon coconut oil
– 1/4 cup crushed nuts (almonds or walnuts)
– 1/4 cup shredded coconut
– 1/4 cup sprinkles (optional)
– 4 wooden popsicle sticks
These ingredients will help you create a sweet treat that everyone will love. Ripe bananas are key here; they should be firm yet soft enough to bite into. Dark chocolate chips give a rich taste, while coconut oil helps the chocolate melt smoothly. You can choose your toppings based on what you like best.
Feel free to mix and match nuts, coconut, or sprinkles for fun textures and flavors. The wooden sticks make it easy to hold and eat your pops. Enjoy the process of creating this tasty dessert!
Step-by-Step Instructions
Preparation of Bananas
Start by peeling the bananas. Use your hands to remove the skin. Next, cut each banana in half. You should have four equal pieces. Now, take a wooden popsicle stick and insert it into the cut end of each banana half. Make sure it goes in deep enough to hold the weight. Place the banana pops on a baking sheet lined with parchment paper. This setup makes it easy for later steps.
Melting the Chocolate
Now it’s time to melt the chocolate. In a microwave-safe bowl, mix one cup of dark chocolate chips with one tablespoon of coconut oil. The coconut oil helps the chocolate melt smoothly. Heat this mixture in the microwave. Set it for 30 seconds at a time. Stir the mixture after each interval. Keep heating until the chocolate is fully melted and smooth.
Coating the Banana Pops
Once the chocolate is melted, it’s time to coat the bananas. Dip each banana pop into the melted chocolate. Use a spoon to help coat them evenly. Let any excess chocolate drip off. After dipping, roll the banana pops in your choice of toppings. You can use crushed nuts, shredded coconut, or even sprinkles for fun. This adds extra texture and flavor.
Freezing the Banana Pops
After coating, place the banana pops back on the parchment-lined baking sheet. Make sure they are spaced out. Now, it’s time to freeze them. Put the baking sheet in the freezer. Let the pops freeze for about 1-2 hours. This will allow the chocolate to harden completely. Once ready, you can enjoy them right away or store them in an airtight container in the freezer for up to one week.
Tips & Tricks
Choosing the Right Bananas
When picking bananas, look for ripe ones. Ripe bananas should have a few brown spots. They should feel firm but not hard. The sweetness of ripe bananas will blend well with the chocolate. Avoid green bananas; they won’t taste as sweet. If you let them sit for a day or two, they will ripen more.
Achieving Smooth Chocolate Coating
For a smooth chocolate coating, melt your chocolate slowly. Use a microwave-safe bowl for the dark chocolate chips. Add coconut oil to help the chocolate melt smoothly. Heat in 30-second bursts, stirring in between. This keeps the chocolate from burning. Make sure the chocolate is fully melted before dipping the bananas.
Customizing Toppings
Get creative with toppings! You can use crushed nuts, like almonds or walnuts. Shredded coconut adds a nice flavor too. Want something fun? Use sprinkles for color! You can even mix and match toppings. A little peanut butter or caramel drizzle adds a tasty twist. Think outside the box and try different flavors!
Pro Tips
- Choose the Right Bananas: Opt for bananas that are ripe but not overly soft, as they will hold their shape better when frozen and dipped in chocolate.
- Use Quality Chocolate: For the best flavor, use high-quality dark chocolate. You can also experiment with milk or white chocolate for a different taste.
- Customize Your Coatings: Get creative with your toppings! Try different combinations of nuts, seeds, or even crushed cookies for a unique spin on your banana pops.
- Serve Immediately: These banana pops are best enjoyed right after they come out of the freezer, as the chocolate coating is crisp and the banana is perfectly frozen.
Variations
Different Types of Chocolate
You can use three types of chocolate for your banana pops: milk, white, or dark chocolate. Each type gives a unique taste. Milk chocolate is sweet and creamy. White chocolate is rich and smooth. Dark chocolate has a bold, intense flavor. You can mix and match these chocolates to find your favorite!
Alternative Toppings
Toppings can make your banana pops special. Try crushed cookies for crunch. Dried fruits add sweetness. You can also use seeds or spices like cinnamon. Get creative with the toppings. Mix and match to find your favorite combinations.
Flavor Infusions
Want to change the flavor of your banana pops? Add peanut butter for creaminess. Drizzle caramel for a sweet touch. You can even sprinkle spices like cinnamon or nutmeg on top. These little changes can take your pops to the next level.
Storage Info
Storing Unconsumed Pops
To keep your banana pops fresh, store them in the freezer. Use an airtight container to prevent freezer burn. You can also wrap each pop in plastic wrap for extra protection. This method keeps the pops safe and tasty.
Shelf Life
These chocolate-covered banana pops last in the freezer for up to one week. After that, they still taste good, but the quality may drop. I recommend eating them within this time for the best flavor and texture.
Re-freezing Tips
If you need to re-freeze your banana pops, do it carefully. Only re-freeze them once. Make sure they are fully thawed before refreezing. This helps maintain the banana’s texture and taste.
FAQs
Can I use other fruits for pops?
Yes, you can use many fruits for pops. Strawberries, apples, and peaches work great. Cut the fruit into bite-sized pieces. Make sure they are firm and not too juicy. This helps the chocolate stick better. You can also freeze the fruit before coating it. This adds a nice chill to your treat.
How do I prevent the chocolate from cracking?
To keep the chocolate from cracking, use good melting techniques. First, melt the chocolate slowly. Heat it in short bursts in the microwave. Stir often to avoid hot spots. You can also add a little coconut oil. This keeps the chocolate smooth and flexible.
What type of chocolate is best for melting?
Dark chocolate chips are the best choice for melting. They melt well and have a rich taste. You can also use milk chocolate or white chocolate if you prefer. Look for high-quality brands for the best flavor. Brands like Ghirardelli or Nestlé work well.
You learned how to make delicious chocolate banana pops with simple steps. We covered the ingredients, step-by-step instructions, tips, variations, and storage info. Making these treats is easy and fun. You can customize them with different toppings or flavors. Enjoy your chocolate banana pops as a tasty snack or dessert. Keep exploring and experimenting with new ideas. You’ll find your favorite combinations and impress your friends and famil